

When Should You Replace Crutch Tips? Signs to Check Before Use
Time : Sep 21, 2026 View : 63

Crutch tips should be replaced when wear, damage, looseness, or contamination prevents a secure and even contact with the floor. A fixed calendar cannot answer every case. Surface type, frequency of use, storage, cleaning, and the user’s walking pattern all affect wear. Before each use, the rubber tip should sit firmly on the tube, meet the floor evenly, and show no split, exposed material, severe tread loss, or trapped object. For distributors and care facilities, replacement planning starts earlier: the correct tip dimensions, attachment method, model match, and spare-part identification should be confirmed before products reach users.
Replace the Tip When Visible Wear Changes Ground Contact
The underside of a rubber tip is designed to meet the floor as a complete contact surface. As tread wears down, the edge can become rounded or uneven. A split may open under load even when it looks small at rest. Inspection should therefore include the base, sidewall, and connection to the tube. If the tip cannot sit flat or remain secure, the crutch should be removed from use until a compatible replacement is fitted.
Look for tread loss and uneven edges
Turn the crutch over and inspect the full base. Compare the center and outer edge rather than looking at one spot. Deep wear on one side can make the tube stand at an angle. A heavily worn or polished base should be reviewed for loss of tread and uneven contact. Do not add a homemade layer or cut the rubber to restore a pattern. Replace the part with a matched tip when the contact surface is no longer intact.
Check cracks, splits, and embedded debris
Flex the sidewall lightly and look for cracking around the tube opening and lower edge. Remove loose dirt according to the product instructions, but do not keep using a tip with a structural split. Glass, stones, or hard debris embedded in the base can damage flooring and change contact. If cleaning does not restore a complete and intact contact surface, replacement is appropriate.
Test for looseness on the tube
A tip that rotates, slides, or separates during a light hand check needs attention. Confirm that the tube reaches the intended depth and that the rubber is not stretched or torn around the opening. Tape, glue, or a smaller improvised insert can hide a mismatch without providing the original fit. Use the model and tube dimensions to identify a compatible part.
Do Not Use a Fixed Replacement Interval Without Evidence
Some buyers want a single number of weeks or months for every crutch. That can create false confidence. A lightly used indoor pair and a rental pair moving across rough outdoor surfaces will not necessarily wear at the same rate. The inspection result should control replacement, supported by the manufacturer’s instructions and the care provider’s procedure.
Set inspection timing around the use setting
Home users may check tips before each use and after contact with mud, moisture, or debris. Shared equipment needs a check at handover and after cleaning. Rental and institutional stock may also need a documented inspection during receiving and return. The schedule should be frequent enough to find visible wear before release, yet it should not claim a service life that the supplier has not verified.
Record changes instead of guessing service life
A simple record can name the model, tip code, inspection date, observed condition, and replacement action. Over time, buyers may see that a particular route or handling process is associated with faster wear. That observation can support stock planning, but it should not be turned into a universal durability claim. Use actual records from the intended channel.
Match the Replacement Tip to the Exact Crutch
Rubber tips for crutches are not automatically interchangeable. Tube outside diameter, insertion depth, base shape, material, and attachment design can differ. The replacement should fit the model and follow its instructions. Buyers should ask for dimensions or a part code rather than ordering from appearance alone. Color and tread pattern may help identification, but they do not prove compatibility.
Confirm tube size and attachment method
Measure only where the manufacturer allows and compare the result with the specified replacement. Check whether the tip pushes on, threads on, or uses another retention method. If a metal insert or internal washer is part of the original design, ask whether it is included. A replacement that is too loose can move; one that is too tight may be damaged during fitting.
Keep paired parts consistent
When one tip is worn, inspect the other side at the same time. Replacing both may be appropriate when their wear or specification differs, but the product guidance should control the decision. After fitting, stand the pair on a level surface and compare contact, height, and alignment. A different base thickness can alter the effective setup and may require another height check.
Separate compatibility from marketing language
Words such as universal, heavy duty, or non-slip need evidence and dimensions. A broad claim should not replace the model match. Ask which crutch types and tube sizes the part supports, which surfaces or use limits are stated, and how the item is packaged. Parts without confirmed model compatibility should not be added to approved spare stock.
Use Product Information to Plan Spare Parts
XY-925 is an aluminum underarm medical crutch with anti-slip rubber pads. The model is available in 1.0mm / 1.1mm / 1.2mm tube thickness options, with 9-level foot-tube adjustment and 5-level grip adjustment. Before use, both crutches should be set to equal height and the selected adjustment positions should remain secure. Tip condition and adjustment security therefore belong in the same pre-use check. A replacement tip still needs an exact model and dimension match; an XY-925 part should not be assumed to fit every model in the crutch product range.
Ask for a model-linked spare-part reference
The quotation can list the crutch model, tube specification, original tip description, replacement part code, unit packing, and quantity. If several sizes share a carton, label them so warehouse staff can separate them. Buyers should also ask whether replacing the tip changes any inspection or adjustment step. Warranty, service-life, or performance terms require written confirmation for the quoted model and order.
Inspect spare tips when they arrive
Receiving teams can compare the part code, dimensions, base shape, and opening with the approved sample. Look for cracks, deformation, hardened rubber, or inconsistent molding before stock is released. Fit one part to the intended model and confirm that it seats fully and remains stable during the permitted check. Keep the accepted example or inspection record with the spare-parts file.
Build Tip Checks Into Daily and B2B Procedures
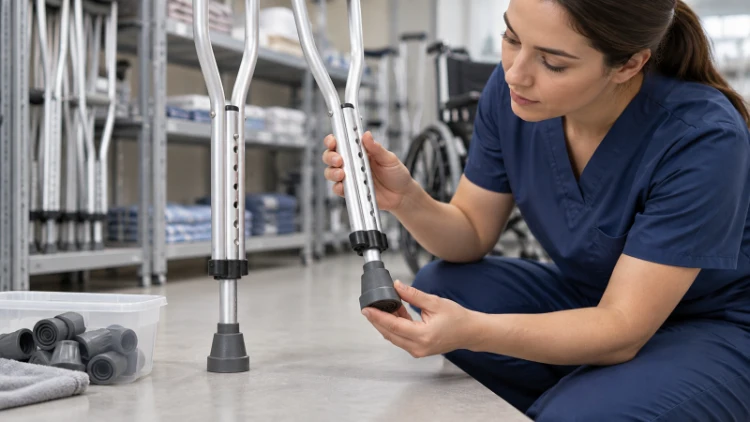
The user-facing check and the purchasing check should remain separate. Users and care staff inspect condition, contact, and security before use. Buyers confirm compatibility, identification, packing, and replenishment routes. Combining both into one vague instruction makes it difficult to see whether a fault belongs in the daily procedure or the supplier inquiry. Facilities should limit cleaning to methods permitted for the product; aggressive chemicals, heat, or cutting can change the rubber and hide damage. Distributors should decide where spare tips will be held and how downstream users will identify the right item. A model-to-part table can capture the tube size, approved tip code, pack quantity, and date of the last verification.
What facilities should check
Before use, check the base, sidewall, tube connection, and floor contact. Confirm that the pair has compatible tips and matching adjustment. After outdoor use, remove debris and dry the part according to the instructions. If the tip is split, loose, badly worn, or unable to sit evenly, remove the crutch from service until the correct part is fitted. Walking technique and device selection still require healthcare provider guidance.
After cleaning, let the contact surface dry and inspect it again under good light. A tip that remains distorted, contaminated, or visibly damaged after cleaning should not return to service solely because some tread remains visible.
What buyers should require
The RFQ should state the crutch model, required tip specification, spare quantity, labeling, and sample check. Ask how the tip is identified and whether it is supplied individually or in pairs. Compare Xunyu Medical crutch models against the required tip dimensions and attachment method, then confirm the selected item in writing. Review the available service information and ask which order documents apply to the selected model.
When the supplier changes the tip material, mold, dimensions, or attachment design, the buyer can request a new sample check instead of assuming that an old record still applies. Packaging changes can be reviewed separately through labeling and packing approval.
Conclusion
Replace a crutch tip when tread loss, uneven wear, cracking, embedded debris, or looseness prevents complete and secure ground contact. Do not rely on a universal calendar or appearance alone. Inspect both sides, match the replacement to the exact tube and model, and repeat the height check if the new base changes the setup. A dated condition record makes future replenishment decisions easier to explain and verify. For bulk orders, link every spare tip to a part code, carton label, approved sample, and receiving check. Buyers can submit a crutch-tip enquiry with the target model, tube details, expected channel, spare quantity, and compatibility questions.


