

How to Adjust a Walking Cane to the Right Height
Time : Sep 02, 2026 Ansicht : 30

A walking cane is simple equipment, but a poor height setting changes how it feels almost immediately. If the handle sits too high, the shoulder may lift. Too low, and the user may lean or reach down more than expected. The cane should feel like support beside the body, not something the user has to chase with every step.
Cane fitting is still personal. A doctor, physical therapist, or other trained healthcare professional should assess gait, balance, side of use, and any limits after surgery or injury. The checks below are useful for preparing a cane and spotting obvious setup problems.
Start With the Shoes the User Normally Wears
Cane height should be checked while the user is wearing the footwear used most often for walking. A thick sole or a different heel can change the standing position enough to make an old setting feel wrong.
Stand on a firm, level floor. The shoulders should be relaxed and the arms resting naturally at the sides. A stable rail, counter, or caregiver can provide support while the cane is being adjusted.
Do not take the measurement while the user is leaning heavily on the cane. That changes posture and can lead to a misleading setting. If standing without strong support is not safe, the fitting should be completed by a professional.
Use the Wrist as a Starting Reference
A common clinical reference places the cane handle around wrist level when the arm hangs naturally. When the user grips the handle, the elbow should remain slightly bent rather than locked straight.
MedlinePlus gives the same general reference: the handle should be at wrist level, with a slight bend at the elbow while holding the cane.
This is a starting point, not a prescription for every person. Pain, weakness, posture, joint range, and gait pattern can all affect the final setting.
The handle should not push the shoulder upward. It should not leave the user reaching down either. If the body looks noticeably tilted just to hold the cane, the height deserves another check.
Change the Height One Setting at a Time
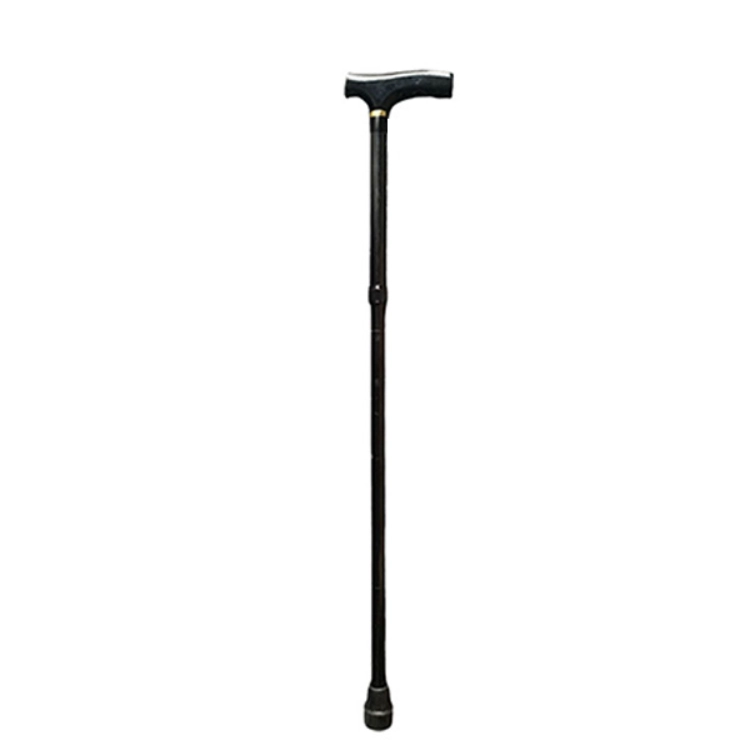
Most adjustable canes use either a push button, a locking collar, or a combination of the two.
Release the mechanism according to the cane instructions, then move the inner tube to the nearest suitable setting. Avoid jumping several positions unless a professional has asked for a larger change.
A spring button should come fully through the selected adjustment hole. If only part of the button is visible, the cane is not ready to use. Twist collars should also be tightened as directed so the inner tube does not move during walking.
Do not use tape, improvised wedges, or a loose collar to keep a damaged tube in place. A cane that will not lock cleanly needs repair or replacement.
Xunyu Medical crutch and cane range includes adjustable walking aids with different locking and grip arrangements. The adjustment method should always match the actual model in use.
Recheck the User After the First Adjustment
Once the cane is locked, let the user hold it normally for a moment. Look at the shoulder, wrist, hand, and elbow from the side.
The shoulder should stay relaxed. The elbow should have a small bend, and the hand should meet the grip without an obvious reach up or down.
Even a small height change can affect how the cane feels, so there is little value in repeatedly moving the tube at random. If the user still feels off balance or uncomfortable after a reasonable adjustment, the problem may not be height alone.
Footwear matters here too. Someone who wears one pair of shoes indoors and another outside may need the approved setting checked with both.
Check the Rubber Tip Before Walking
A correctly adjusted cane can still be unsafe if the floor contact is poor.
Look at the rubber tip from several angles. It should sit flat and should not be cracked, separated, worn smooth on one edge, or loose around the shaft.
Put the cane on a clean, dry floor and check whether the shaft appears straight when the handle is held naturally. If the cane rocks, slips, or leans because of damage at the tip, changing the height will not solve the problem.
Replacement tips should match the model or confirmed size. Two tips may look similar but fit the shaft differently.
Outdoor use can wear the rubber faster, especially when the cane regularly meets rough pavement, damp paths, or grit. A quick check after coming indoors can catch wear before it becomes obvious during a walk.
Try the Cane on Familiar Ground First
After any adjustment, practise in a familiar, supervised area before taking the cane onto stairs, crowded spaces, or uneven outdoor surfaces.
A level indoor floor is a good starting point. Then check the doorway threshold or other surface the user normally crosses. The cane should plant firmly without catching or sliding.
Wet tile, loose rugs, gravel, steep slopes, and raised edges need more care. If the cane repeatedly slips or catches, sit down and review the setup rather than changing the height again and again.
The user should also avoid placing the cane so far ahead that it no longer supports the planned step. Walking technique should follow the pattern taught by the healthcare professional.
Which Hand Should Hold the Cane?
Many people are taught to hold a cane on the side opposite a weaker or painful leg. That is common advice, but it is not a rule that fits every condition.
The correct side can depend on the reason for using the cane, balance, strength, pain, surgery instructions, or another mobility problem. Once a clinician has set the pattern, keep it consistent while practising.
Switching hands simply because one side feels more familiar can change the support pattern. If the user is unsure which side is correct, that is a better reason to ask for professional guidance than to guess.
Watch for Common Problems Around the Home
A cane works best when the route around it is predictable.
Grabbing a door frame, countertop, or shopping bag at the same time can create an awkward half-step. Keep the free hand available for the support that is part of the user’s agreed walking plan.
Store the cane where it will not become a trip hazard. A hallway floor is a poor place. Keep it upright in a stable holder or safely against a wall away from a door swing.
After outdoor use, wipe away water or grit and look at the tip again. Keep the height button and collar visible so the next check is easy.
If the user starts having new falls, repeated near-falls, sudden weakness, dizziness, or much more difficulty walking, the answer is not another quick cane adjustment. Stop and seek professional advice.
For questions about the correct adjustment mechanism or replacement parts, the Xunyu Medical contact team can help with model-specific information.
More elderly mobility products are available through Xunyu Medizinische.
Schlussfolgerung
The basic height check is straightforward: use normal shoes, stand on firm ground, bring the handle close to wrist level, keep a slight bend at the elbow, and lock the adjustment mechanism fully.
Then look beyond the number on the tube. The rubber tip, walking surface, side of use, balance, and the user’s condition all affect whether the cane feels controlled.
A setting that looks right but still feels wrong deserves another assessment, not repeated guesswork.
Häufig gestellte Fragen
Q1: How high should a walking cane be?
A1: A common starting reference places the handle near the wrist when the arm hangs naturally. The elbow should remain slightly bent while holding the grip. A healthcare professional should confirm the final setting for the individual user.
Q2: Which hand should hold a cane?
A2: Many users are taught to hold the cane opposite a weaker or painful leg, but the correct side depends on the reason for using it and the person’s gait, balance, and strength.
Q3: How can a caregiver tell whether the cane is locked?
A3: Check that the adjustment button is fully through the selected hole and that any locking collar is tightened as directed. A half-visible button, loose tube, or damaged locking mechanism should be dealt with before walking.


